Tuesday, April 30, 2013

Day 120) Nail art dry flowers

I had a great Queensday!
First we watched some tv on which they showed the abdication of Princess Beatrix:


and the investiture of King Willem-Alexander:


To be there in person (which means watch it on the big screen in Amsterdam) is almost impossible because of the crowd and it's much better to watch it on tv anyway.
Then we went to Breda which is the capital city of my province.
The Netherlands has become a country of individuals but at days like these we are all one!
It was a huge orange crowd, not just in Amsterdam but all over the Netherlands.
With people drinking, dancing, laughing and making new friends.
I love this!
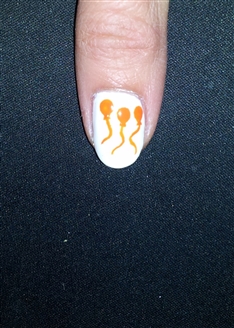
It was already very late when we came home but for my challenge I still had to do a nail art...aaaarrrrgggghhhh.
I looked for something easy and...found it: Dry flowers

Dry flowers:


Dry flowers are mostly used for gel and acrylic nails but in my opinion you can use them for nail art on natural nails just as well.

I do recommend you only use the more flatter ones because they stick better, look prettier and don't get damaged that easily.


Usage:
1) Give your nails a basecoat (for a natural look) or paint them in the desired colour.
    You can already use this coat as a glue for your dry flowers but I prefer that let this coat dry.
2) Give your nails a clear coat and use this as glue for your dry flowers.
3) Put the dry flowers on the desired place of your nails.
4) Finish it with a topcoat.
Done!


Too simple for you??
You can always pimp it up by adding some material.
I pimped my nails by using a glitter topcoat and some beads.
I prefer simplicity but hey, we are all different.


The glitter topcoat I used is:
Essence nail art special effect! topper - Nr. 16 Cool breeze

I used this glitter topcoat as glue for my beads.


Which look do you prefer? The simple one or the pimped version?
Let me know!


Monday, April 29, 2013

Day 119) Nail art Queensday

Tomorrow is the abdication of our Queen Beatrix and the investiture of Prince Willem-Alexander.
A day in history for our small country The Netherlands.

Of course I have to do a nail art about this:


On the left you see a homemade waterdecal of our Queen Beatrix en on the right is our new King Willem-Alexander.
The rest is hand painted.

Sunday, April 28, 2013

Day 118) Laser Lace

For today I have some Laser lace designs I want to show you.
I already did a laser strands nail art on a previous blogpost.
I liked the overall look but the strands weren't easy to use.
The laser lace looks like laser strands but then pressed together as a kind of lace.


The white material that you see on the picture is a felt-like paper. It's for protection of the lace and also makes it somehow easier to cut the lace in the desired design.

Usage:

  1. Cut out a piece of laser lace
  2. Remove the felt-like paper (if you haven't done this already)
  3. Apply some clear coat on the nail
  4. Stick the piece of laser lace on the nail
  5. Finish it with topcoat
For this nail art I want to swatch my new nail polish. So here it is:


This is Essence LE Floral Grunge nail polish The pearl - Nr. 02 Lily Bloom
I love this colour! It's white with a little sparkle in it which gives it the pearly look.
It is so classy and perfect for weddingnails. Only two thin layers of nail polish is enough.

Because it is so simple to use I only have a few pictures:


Cut the laser lace in the right shape and remove the felt-like paper


Put on a clear coat and use this as a glue for the laser lace.
Stick the laser lace on the nail and cut off the excess.
Finish with topcoat.
Done!

It's all the same when you are using the laser lace only as a detail on the nail. The only difference is the shape and size you cut:

Triangle


And this is the overall look:


I really love this look and so does my husband. It's lovely and sweet and very classy for a diner, a party or a wedding.
It's so much easier to use than the laser strands. Cut and stick that's all!

To accent the laser lace I used some other material as well;
-Round rhinestone and rectangular rhinestones on the ring finger
-Striping tape on the middle finger
-Crushed shell on the index finger
-Diamond-shaped flitter on the thumb

Saturday, April 27, 2013

Day 117) Kingsday nail art

Today is Kingsday in the Netherlands.
Not official yet because the crowning is on Tuesday when it's Queensday.
It's been a while since we had a king so everybody is very excited and already celebrating this day.

For this day I have to do some national nail art.
Less interesting for you guys....??
No! You can still use the designs in different colours or make your own national nail art with it.


 These colours are my base for the nail arts.
N.B. Our flag contains red, white and blue and the colour we use at special events like the Olympics, Queensday is orange.

1)


I started with some randomly placed red dots. For this I used a dottingtool. After the reds I did some orange dots and finished it with some blue dots. Outcome: Dutch confetti

2)


First I made a gradual design with white on the middle of the nail.
I do this because my red and blue aren't good for 1 coat. At least not when they are applied on darker colours like the orange.
The first step gets a red colour. The second a white and the third a blue colour. I like to give my designs some golden accents because of the king/queen. But it also gives the opportunity to disguise some failures.

3)


Start by making a crown.
Make two ribbons underneath the crown.
Give the ribbons the colours of your flag.
I detailed the nail art by giving the crown some gold (bottom) and gold glitters (outlines).

4)

For this design I simply used the same technique as you would do to make a tigerprint.
Place stripes alternately. Starting thicker on the outside and thinner at the inside.

5)


Start by making some balloons.
Then give the tip of the nail your flag colours by using something simple to apply (beads/billions/caviar, velvet or in this case glitters).
Use a brush to paint one stripe of clear coat on the desired place. Glitter it. Then apply the second stripe of clear coat and glitter it. Do the same for the last colour.

Total look for Kingsday


Friday, April 26, 2013

Day 116) SmART nails N019


SmART nails stencils are available in a lot of different designs.
I chose this one because it's hard to do this design by hand and have the same perfect outcome.
Note: Before you do any stencil or tape mani keep in mind that the colour you used as a base should be completely dry. When this is not the case you wil ruin your base colour by pulling some of it off with your stencil or tape. I recommend you paint your nails in the desired colour at least a few hours before you will do a tape or stencil mani (or have a very good fastdrying topcoat).
Before use make sure that you'll reduce the intensity of the glue by sticking the stencil (or tape) a couple of times on some skin or fabric.
Then put the stencil on the desired place and make sure it's flat and touches the nail well.
Apply the nail polish and remove the stencil immediately. Apply topcoat. Done!

I have 5 different designs for you:


1)


2)


3)


4)


5)


And this is the total look:


I used a lot of colour. But if you use only black and white or maybe some red you can get a very classy look.


Thursday, April 25, 2013

Day 115) Nail art day & night


Today was a very nice day.
The weather reminded us of the Summer that's going to come.
I spent the day sitting in my backyard while the kids were playing with water and sand.
Tomorrow it will be a lot colder and we will even get some rain again.
The difference in weather is as big as the difference between day and night. Which brought me to the theme of this nail art "Day & Night".
If got 5 different designs for you:

First design:


1. Start with painting the nail in black. When this is dry. Divide the nail diagonal in half with a light blue colour as shown on the first picture.
2. Take yellow and make a sun and moon.
3. Then detail the nail art with some white and black: eyes and mouth of sun and moon. Some white stars (small dots) on the 'night' side and some white clouds on the 'day' side.


Second design:


1. Start by painting the nail in a light blue colour.
2. Then paint a white circle on the nail.


3. Divide the circle in a kind of Yin and Yang by using a blue en yellow colour.
4. With the light blue you make the moon and some stars (small dots) on the 'night' side. With orange you make the sun on the 'day' side.

Third design:


1. Start by painting the nail blue. When this is dry make the lower half dark blue.
2. With yellow you make the sun on the upper half. I used light blue for the moon and stars.

Fourth design:


1. Paint the nail white. Use black to divide the nail as shown on the first picture.
2. The white half circle represents the moon. On the other side you create a half sun with yellow.

Fifth design:


1. Paint half of the nail white and half yellow.
2. Use black to make a circle and divide the circle as shown on the second picture.


3. Fill up the left side of the circle with the same yellow as the rest of the half nail.
4. Give the left side some sunbeams. You can do this by making the rest of this side blue (see picture)


5. Now dot the same for the other side (moonbeams) and make everything outside these beams and on that side dark blue.
6. Now give the sun some body by making an orange mouth and eyebrow and by giving it an open eye. Detail the sunbeams. N.B. The sun and moon are sharing the mouth and nose.


7. The last step is giving the moon some details; give the mouth a blue colour and make a closed eye (see picture).
The moonbeams get some more detail by using the dark blue colour.


These are my 5 designs for a day & night nail art.


  Hope you like them!