Showing posts with label elegant. Show all posts

Monday, November 4, 2013

Day 308) Elegant sexy

I wanted to do another nail art for the 'sexy' challenge.
I decided to make some kind of delicate lace design which is sometimes seen on lingerie.
Now that it is finished I think it's more an elegant design rather than 'sexy' but as long as it's on lingerie as well I guess some people find it sexy ;-D

Tuesday, October 22, 2013

Day 295) Graceful nail art

Today I bought a beautiful polish at Claire's.
In fact, it is so beautiful that I didn't want to cover it with a nail art.
Let's start with some swatches so you know what I'm talking about:


Claire's 60484 Glitter Pink/Purple
 
First of all I don't know why it's also called a pink. I only see a beautiful purple. Now that I'm taking a better look at my pictures you might see that the holo glitter that have a pink glance show more in the pictures...but that's the only pink I can see!
This polish is build up with purple microglitter (mostly), silver microglitter (a little less than the purple) and holo microglitter (rich).
It applies simular to a liquid sand, but maybe with less opacity.
The first coat gives an even glitter look on the nails with a purple glance. You can still see the difference between nail and tip in color.
The second coat makes an almost opaque result, besides some spots round the cuticles.
A third and fourth layer is just to make it perfect.
Application wise this is easy. Polish spreads even and dries quite quickly (which is really nice when you have to apply 3 to 4 coats).
The holo glitter sparkles in every light (artificial and natural) giving taht WOW-factor :D
I didn't want to ruin the holo effect so the pictures above are without topcoat.
But after making my nail art design I decided to give it a chance and applied a topcoat....it got even more prettier!!!
Like I said before, I didn't want to cover these nails with a nail art but as you all knwo my challenge is 365 days of "Nail art" so I felt I had to...
I decided to go for something a bit graceful.
Nothing special; some dots, a swirl, flowers and a tiny butterfly


Friday, August 9, 2013

Day 221) Nail art elegant green leafy stems

On Monday real life starts again.
Early wakening, oversleeping, hurrying, getting the kids to school (on time) and ...so on.
Of course the last days of the vacation aren't at all about resting but about doing al the things I've been postponing the rest of the days :(

I guess this will show in my nail arts as well.
So, please bear with me.

Today another quick one

As base I used a light green, then I sponged some darker shade on top of it and topcoated it.
I finished by painting some elegant green leafy stems with a striper brush and polish.
The picture is before sealing it with a topcoat because I like the depth.

Thursday, June 27, 2013

Day 178) Featuring rhinestones (1)

Today and tomorrow will be all about rhinestones.
Tomorrow will be the last day before we leave for our 3 week vacation and there is still a lot to do.
Rhinestones are easy and quick to use and therefore perfect for these two days.

And to be honest...they are so easily forgotten.
Ages ago I bought a big nail art wheel with about 2500 rhinestones in different shapes.
I maybe used 10 of them and then forgot all about it.

And I am not sure why...
Rhinestones can be so pretty and just give a nail art the elegant touch.

Before I show you my nail art, I have some swatches of China Glaze Holographic - 1171 Infra Red 81159 (which I used as my base color):
The next pictures were taken under a bright light
 
 
Although it's a pretty holo, I've seen better. Outside I had to twist my hand again and again to find the holo. But maybe direct sunlight will do a better job...
 
Now, for the nail art. I will not just apply some rhinestones, but try to do some elegant painting as well. I hope you like the ideas!
Thumb: Abstract with rectangular rhinestone in the middle
Index: Butterfly with rectangular, rain-drop and teardrop rhinestones
Middle: Frame with rectangular and square rhinestones
Ring: Snaky design with round rhinestone
Pinky: Leaf with a flower rhinestone
 

Saturday, June 15, 2013

Day 166) Gradient with holographic designs (elegant nails)

Hi lovelies,

In addition to the black&white and ombre/gradient nails of the past days I came up with today's nail art.
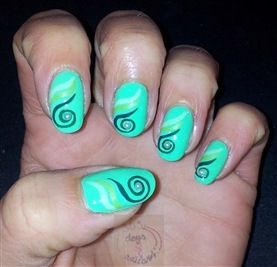
I really like this nail art and keep looking at it; it's elegant, feminine and a little mysterious because of the holo.
Interested?!
There is a short step-by-step:

Step 1: Make a gradient 
I chose for greys and white
Material:


*Essence Vintage District - 04 Get arty
*Catrice Natural Nail Lacquer
  Limited Edition NEONaturals -
  C05 Have A Good Day
*ICI Paris XL - Only You - White French
*Sponge


You can apply a white polish first to get opacity at once, but I don't think this is really necessary.
Put the sponge onto your nail to estimate the size of your nails; you do want all 3 of the colors on your nail and not just 2 or even empty spaces.
Now apply, with the size of your nails in mind, the 3 nail polishes onto the sponge.
The sponge might absorb some nail polish in the beginning, so keep this in mind while applying and repeat if you don't think it's enough.

Now, place the sponge onto your nail (white on the tip) and roll it over the surface of the nail (horizontal).
At least a few times so that the colors nicely blend.
Repeat this step for the other nails. Depending on the absorption of the sponge you'll have to apply the 3 nail polishes again. Not happy with the opacity? Sponge the nails again.


As you can see, you'll have some cleaning to do.
Putting tape on fingers and cuticles can help!
After cleaning I applied a topcoat.

Step 2: Make designs of your choice on the gradiënt nails (use a popping color like red, purple)
Material:


*Catrice Ultimate Nail Lacquer - 39 Black To The Routes
*China Glaze Holographic - 1171 Infra Red 81159
*Striper brush

I chose to do more elegant designs: flower, butterfly, heart, bow and feather.


Thursday, May 23, 2013

Day 143) Simple elegance in greens

Tired and low on inspiration.
So, today's nail art is a simple one.

1) After the basecoat I painted my nails with 2 thin coats of Bourjois 1 Seconde - No. 27 Green fizz

2) Then I used a striper brush and a light green colour to make a wavy stripe (picture 1)
I repeated this step with a little darker green underneath the light one. Again a wavy stripe (picture 2)
1)

2)

3) Then I did a last wavy stripe with dark green underneath the second wavy stripe, only this time I made a swirl at the end

4) To give the nail art some more elegance I placed half pearls in the centre of the swirls. As glue I used my topcoat


For sure not my best nail art. But everybody has an off-day once in a while...today is mine.
I do like the colors though; great for summer!

Saturday, May 4, 2013

Day 124) Elegant nail art

After the handpaintings, nail art material and bright colors it's time for some more modest and elegant nails I think.
This nail art is perfect for a elegant matter, a wedding or just because it reflects your personality.
And...everybody can do it!

Step-by-step:
1) First I've painted my nails in a pearly white colour


2) Where the tip of your nails starts is called the tipline.
Move the tipline to halfway your nail and paint everything underneath this line with a light pink pearly colour
I used a brush for this but you can also use tipline stencils for it.


3) Now get a silver glitter striper and accent your new 'tipline'


4) As a finishing touch I've added some rhinestones. Teardrop rhinestones. Not only does this make the design more elegant it also looks as if you've made a necklace on your nails. Place them in the middle with the sharp side touching your silver tipline


Done!

Good luck en see you tomorrow!