Showing posts with label rhinestones. Show all posts

Tuesday, November 11, 2014

Swatches Catrice Million Styles Effect Top Coat & multichrome rhinestones by Born Pretty Store

Catrice recently came out with a new series of Million Styles Effect Top Coats.


The effect top coats all have a clear base filled with colored glass flecks.

From left to right:
01 Godfather of Pearl 
Godfather of Pearl is a mix of purple and pink glass flecks. 
Although the pink glass flecks are visible, main color is purple.
02 ¿Holo, Que Tal?
¿Holo, Que Tal? is a mix of yellow and orange/pink glass flecks. This is the only one from this collection that has a very visible duchrome shift in any light source.
03 Have an Ice Day
Have an Ice Day is a mix of yellow/green glass flecks. Main color is a bit more green than the yellow color from ¿Holo, Que Tal?
04 Return of Space Cowboys
Return of Space Cowboys is a mix of blue and blurpe glass flecks. Main color is blue.


Of course these effect top coats can be applied over any color nail polish and/or on the natural nails.
I however, prefer lacquers like these applied over black.

'Single nail' swatches show 1 coat of effect top coats applied over 2 coats of China Glaze Liquid Leather (black).
I have a glossy and a matte version for you.

Swatches glossy

Picture taken in light box without flash

Picture taken in light box with flash

Swatches matte

Picture taken in light box without flash

Picture taken in light box with flash

Review 

I can be short.
If you love glass fleck lacquers, these are wonderful for you.
Only note I can give is that they apply like a jelly (a bit syrupy, but workable).
I can imagine this will be harder to apply over time, as it will probably get more and more thick.

Nail art

Today's nail arts feature another product that I received from Born Pretty Store.


Nail art wheel containing 200 pieces of heart, circle and marquise multichrome rhinestone nail decorations.

Of course I could go for a plain look by placing these rhinestones on top of my swatches but that wouldn't be me, as I like to add some personal touch.

I thought of another nail art design that I was still dying to try out.
I wanted to do some sugar spun black strings topped with different colors of metallic transfer foils.
And this was the result:
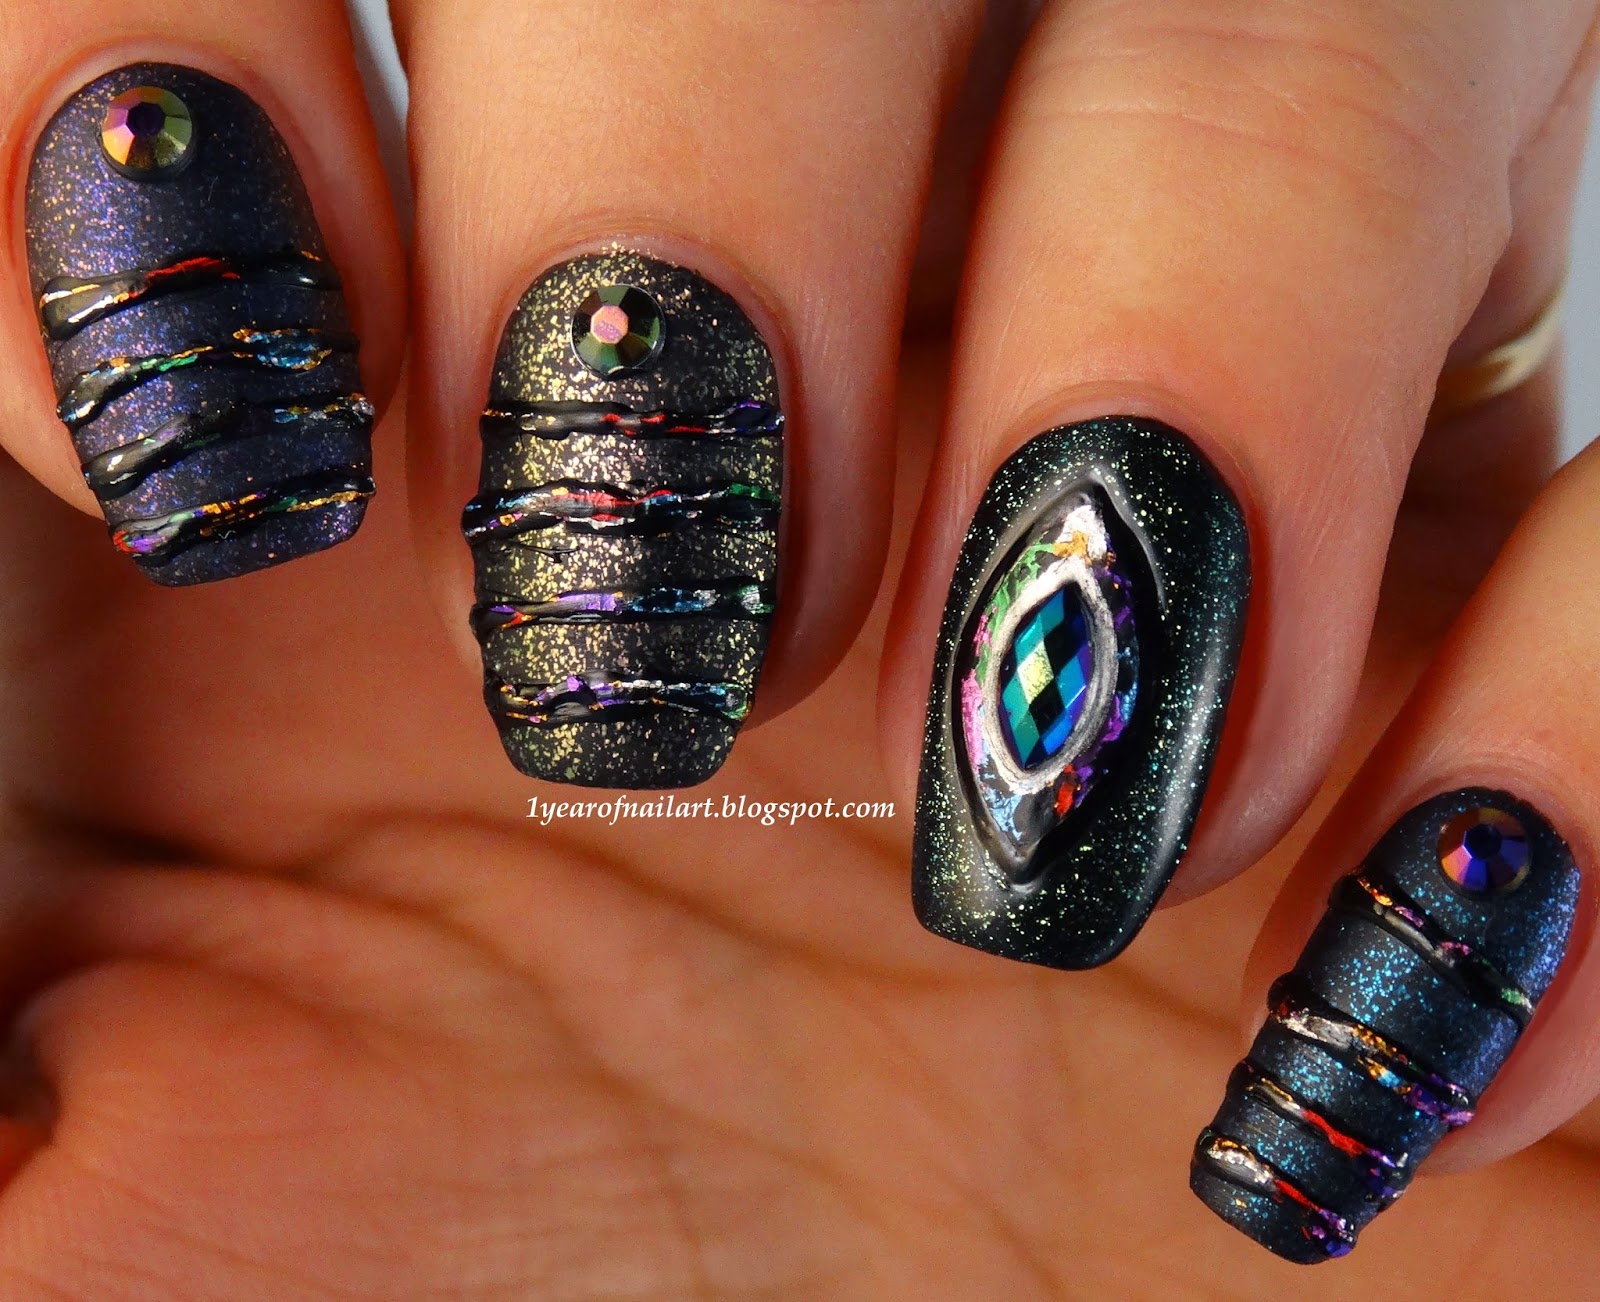

I have to say that the total look was stunning but perhaps a little too much????

So I've made another design but this time a bit more calm...or so I thought :D
Making silver holo area's in which I placed the rhinestones.


If you want to order some goodies from Born Pretty Store.
You can use my code to get 10% off of your order:
HUB10

Saturday, December 21, 2013

Day 355) Christmas nails with subtle 3D

This week's challenge is "3D Chrismas nails".

Although I like the 3D accessories on others, it's not really my thing.
I keep touching it and within a few minutes my mani is already ruined.

In the Netherlands we also have a saying: When you're acting normal, you're already acting weird enough.
Which means that over the top bling is considered to be more trashy than classy.
Not that I care :D but like I said it's just not really my thing...practical wise.

Therefore I've made some Christmas nails with subtle 3D


Thumb: Candy striped nail with nail piercing (star)
Index: Rudolph with rednose rhinestone
Middle: Christmas tree created with striping tape, star stud and beads (caviar)
Ring: Christmas wreath created with green velvet (flocking powder), beads and fabric bow
Pinky: Santa hat created with red velvet and rhinestone. Above Christmas lights with rhinestones.

Friday, October 25, 2013

Day 298) Rhinestones gradient

I've been dying to do a nail art like this for a very long time now.
Simular nail arts have passed my eyes and each time I thought to myself: "I need to do this!"
I only needed colored rhinestones but I found them quite expensive for maybe just one nail art.
Recently I found it a shop simular to a Dollar Shop and of course went for it.

 
Although the wheel has 12 compartments, there are only 11 colors:
  1) 2x Crystal
  2) Crystal AB
  3) Pink
  4) Red
  5) Plum
  6) Dark blue
  7) Blue
  8) Light blue
  9) Brownish orange
10) Green
11) Black
 
I thought a gradient would be best because this way I can show you the most colors.
I didn't bother to make a perfect line between the colors as it is a gradient.


Friday, June 28, 2013

Day 179) Featuring rhinestones (2)

This is going to be a very short post.
The next three weeks I'll be posting from Portugal ;D
I'm not sure what these weeks will bring...blogwise that is.
I don't know if my Internet connection will be good enough.
I don't know if I will post 'single nail' nail arts.
But I do know that this is going to be very challenging period.
I have limited materials with me (base- and topcoat, striper brush, remover).
And I just want to enjoy my vacation and finally have some me (us)-time again.

Lovely readers...
Meet you again from Sunny Portugal!


Thursday, June 27, 2013

Day 178) Featuring rhinestones (1)

Today and tomorrow will be all about rhinestones.
Tomorrow will be the last day before we leave for our 3 week vacation and there is still a lot to do.
Rhinestones are easy and quick to use and therefore perfect for these two days.

And to be honest...they are so easily forgotten.
Ages ago I bought a big nail art wheel with about 2500 rhinestones in different shapes.
I maybe used 10 of them and then forgot all about it.

And I am not sure why...
Rhinestones can be so pretty and just give a nail art the elegant touch.

Before I show you my nail art, I have some swatches of China Glaze Holographic - 1171 Infra Red 81159 (which I used as my base color):
The next pictures were taken under a bright light
 
 
Although it's a pretty holo, I've seen better. Outside I had to twist my hand again and again to find the holo. But maybe direct sunlight will do a better job...
 
Now, for the nail art. I will not just apply some rhinestones, but try to do some elegant painting as well. I hope you like the ideas!
Thumb: Abstract with rectangular rhinestone in the middle
Index: Butterfly with rectangular, rain-drop and teardrop rhinestones
Middle: Frame with rectangular and square rhinestones
Ring: Snaky design with round rhinestone
Pinky: Leaf with a flower rhinestone
 

Wednesday, May 29, 2013

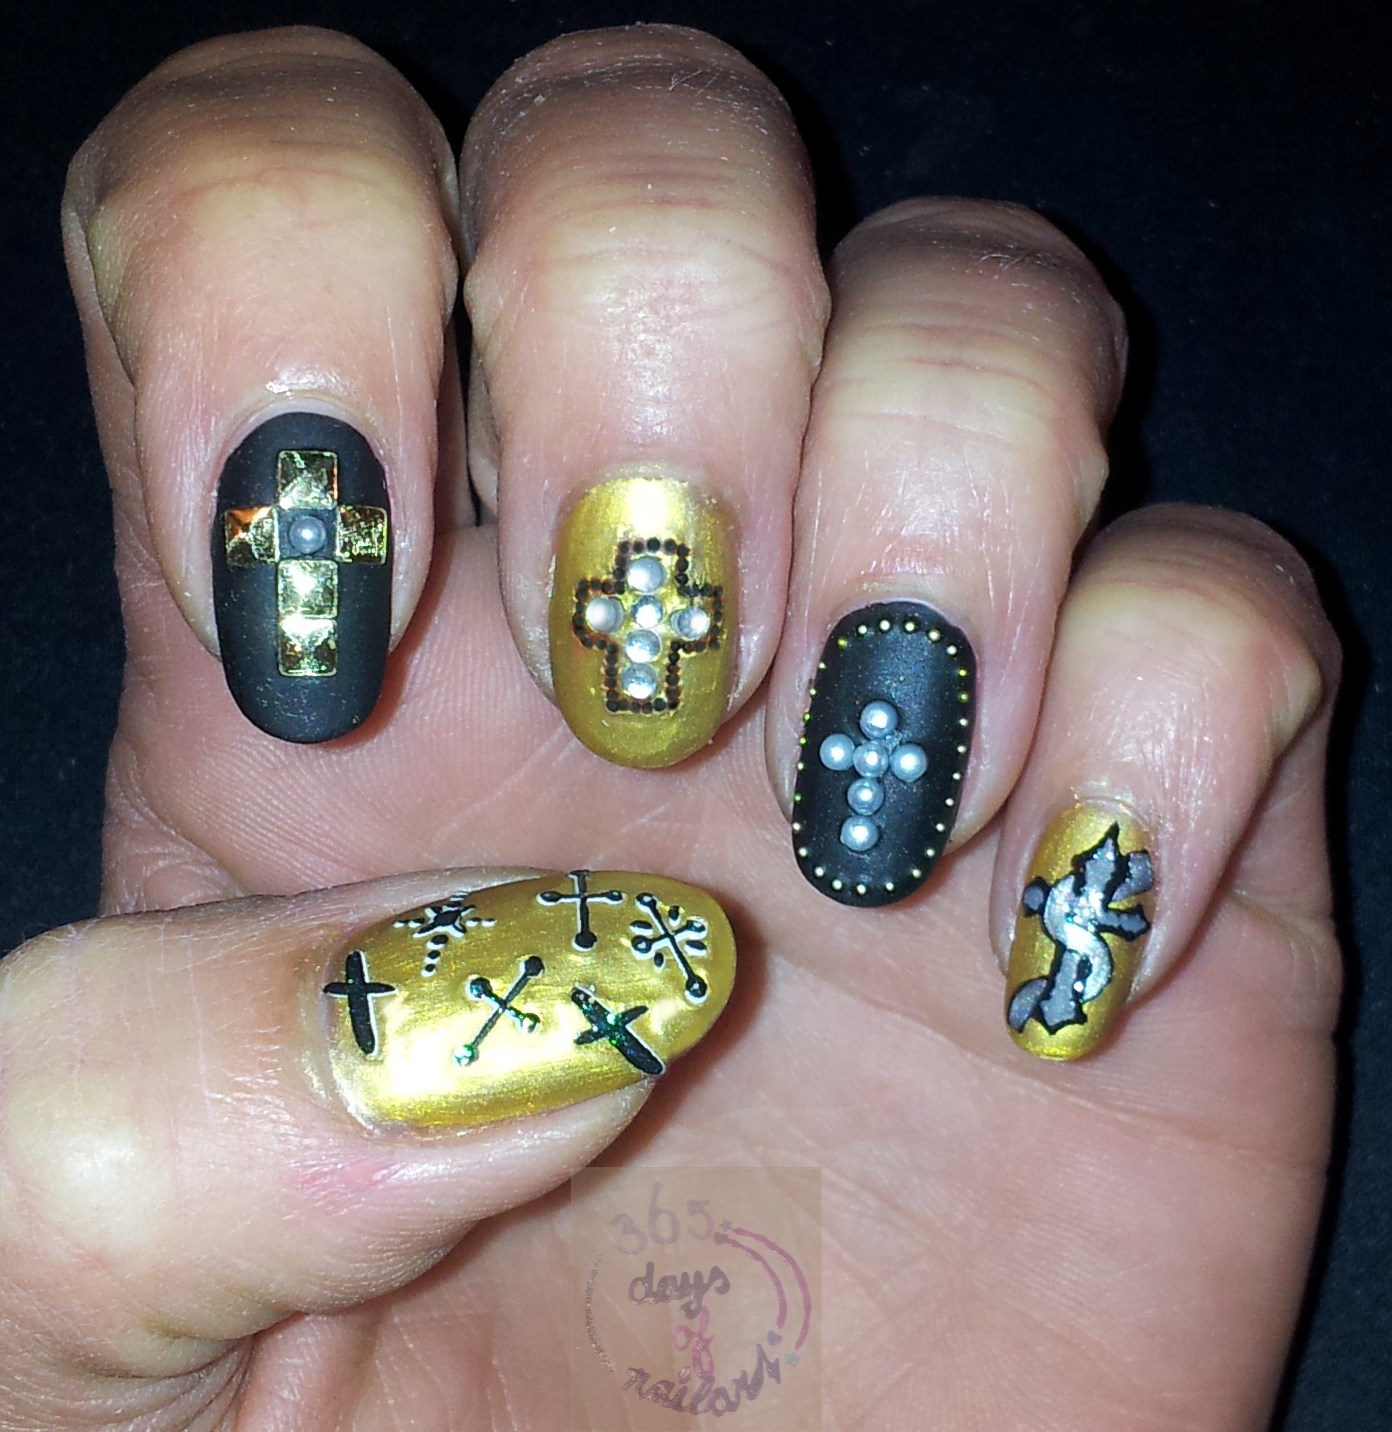
Day 149) Nail art crosses

I've had a request for nails with spikes today.
Only webshops provide these. So, that's an upcoming nail art.
However, I did immediately think about rock nails.
And there are always crosses on rock themed nails.
Today's nail art is only about crosses.


First I painted my nails with a gold and black nail polish. I finished them with a matte topcoat.

Thumb: Max & More (Action store) nail stickers
Index finger: Square studs and pearl
Middle finger: Rhinestones and black beads (on the picture the gold gives the beads an orange look)
Ring finger: An outline of golden beads and a cross made of pearls
Pinky: Striper brush design. I made the outer lines of the cross with a black nail polish. Then colored it with a dark grey. The snaky thing is in silver. (In real life there's a big difference between the grey and silver, but this doesn't show well on the picture)

Hope you like them!

Saturday, May 4, 2013

Day 124) Elegant nail art

After the handpaintings, nail art material and bright colors it's time for some more modest and elegant nails I think.
This nail art is perfect for a elegant matter, a wedding or just because it reflects your personality.
And...everybody can do it!

Step-by-step:
1) First I've painted my nails in a pearly white colour


2) Where the tip of your nails starts is called the tipline.
Move the tipline to halfway your nail and paint everything underneath this line with a light pink pearly colour
I used a brush for this but you can also use tipline stencils for it.


3) Now get a silver glitter striper and accent your new 'tipline'


4) As a finishing touch I've added some rhinestones. Teardrop rhinestones. Not only does this make the design more elegant it also looks as if you've made a necklace on your nails. Place them in the middle with the sharp side touching your silver tipline


Done!

Good luck en see you tomorrow!