Showing posts with label matte. Show all posts

Tuesday, November 11, 2014

Swatches Catrice Million Styles Effect Top Coat & multichrome rhinestones by Born Pretty Store

Catrice recently came out with a new series of Million Styles Effect Top Coats.


The effect top coats all have a clear base filled with colored glass flecks.

From left to right:
01 Godfather of Pearl 
Godfather of Pearl is a mix of purple and pink glass flecks. 
Although the pink glass flecks are visible, main color is purple.
02 ¿Holo, Que Tal?
¿Holo, Que Tal? is a mix of yellow and orange/pink glass flecks. This is the only one from this collection that has a very visible duchrome shift in any light source.
03 Have an Ice Day
Have an Ice Day is a mix of yellow/green glass flecks. Main color is a bit more green than the yellow color from ¿Holo, Que Tal?
04 Return of Space Cowboys
Return of Space Cowboys is a mix of blue and blurpe glass flecks. Main color is blue.


Of course these effect top coats can be applied over any color nail polish and/or on the natural nails.
I however, prefer lacquers like these applied over black.

'Single nail' swatches show 1 coat of effect top coats applied over 2 coats of China Glaze Liquid Leather (black).
I have a glossy and a matte version for you.

Swatches glossy

Picture taken in light box without flash

Picture taken in light box with flash

Swatches matte

Picture taken in light box without flash

Picture taken in light box with flash

Review 

I can be short.
If you love glass fleck lacquers, these are wonderful for you.
Only note I can give is that they apply like a jelly (a bit syrupy, but workable).
I can imagine this will be harder to apply over time, as it will probably get more and more thick.

Nail art

Today's nail arts feature another product that I received from Born Pretty Store.


Nail art wheel containing 200 pieces of heart, circle and marquise multichrome rhinestone nail decorations.

Of course I could go for a plain look by placing these rhinestones on top of my swatches but that wouldn't be me, as I like to add some personal touch.

I thought of another nail art design that I was still dying to try out.
I wanted to do some sugar spun black strings topped with different colors of metallic transfer foils.
And this was the result:
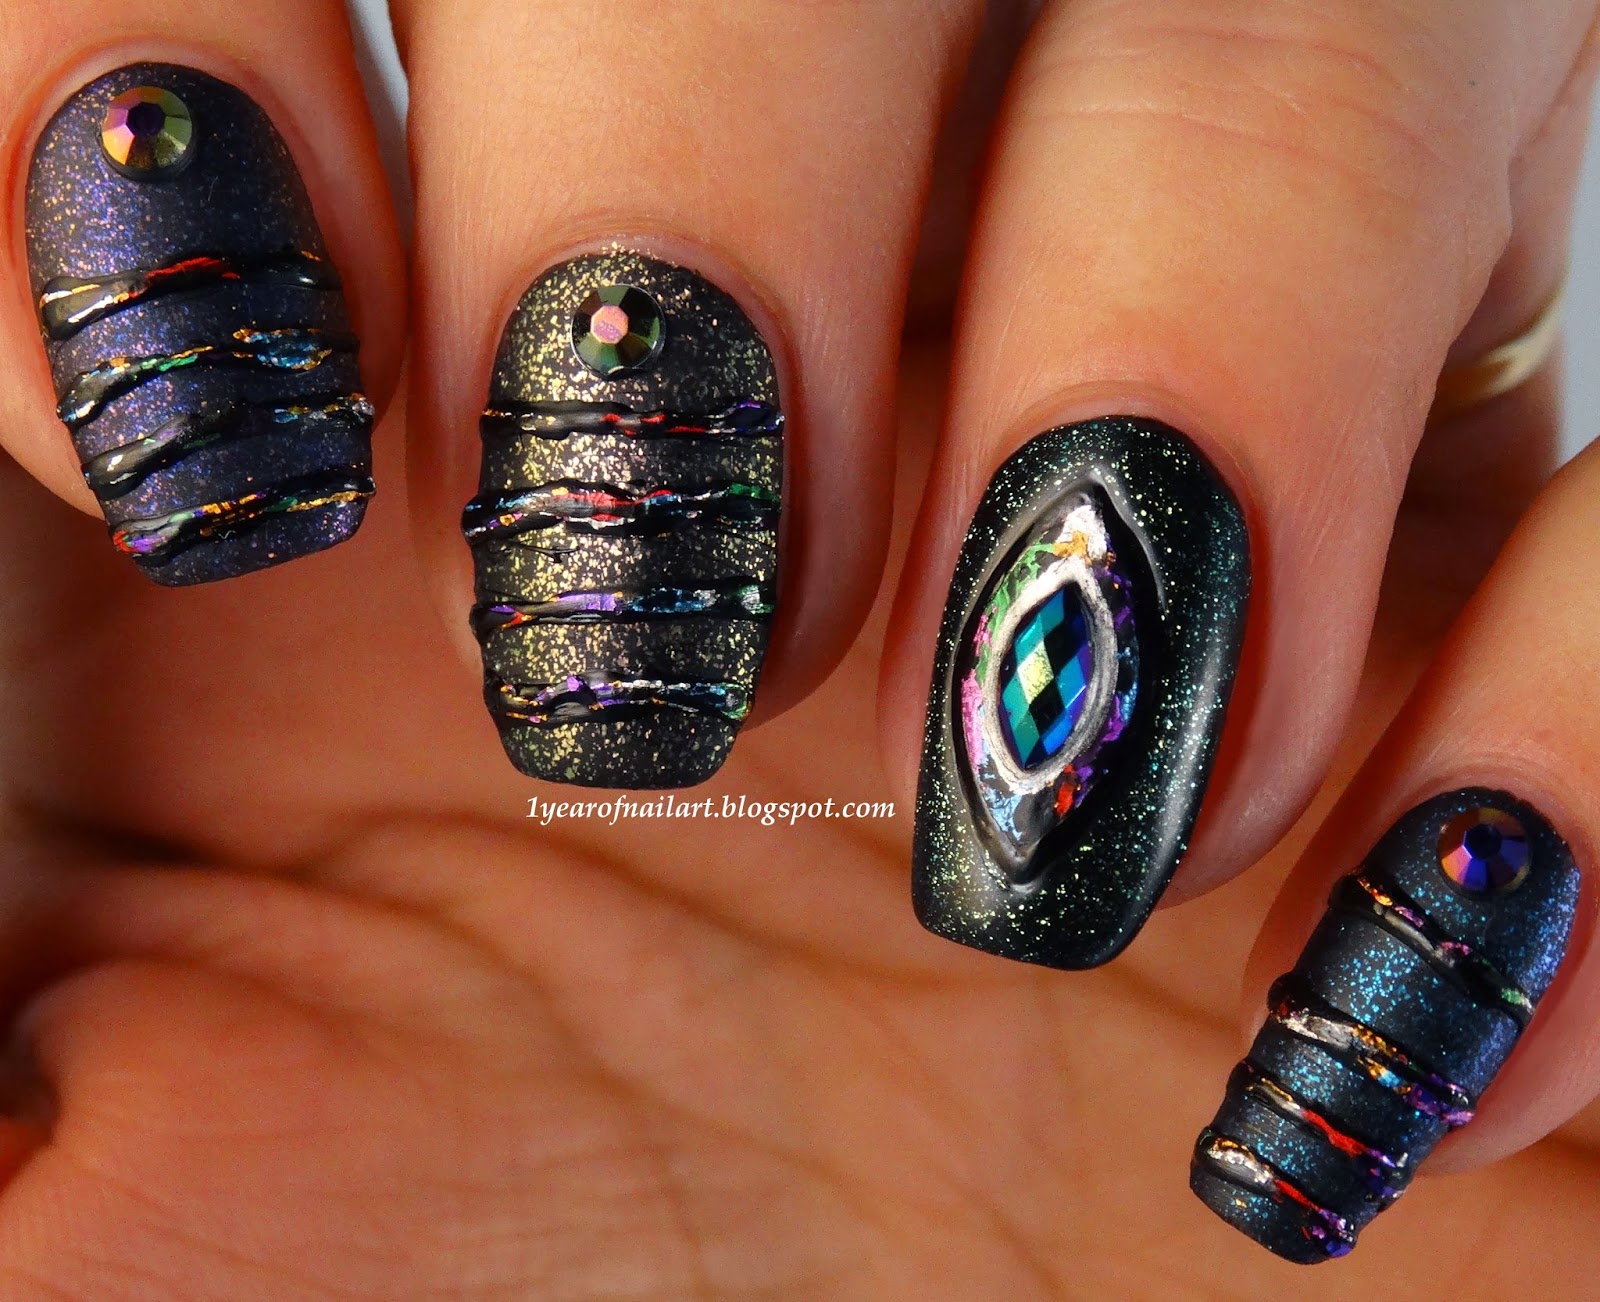

I have to say that the total look was stunning but perhaps a little too much????

So I've made another design but this time a bit more calm...or so I thought :D
Making silver holo area's in which I placed the rhinestones.


If you want to order some goodies from Born Pretty Store.
You can use my code to get 10% off of your order:
HUB10

Saturday, May 3, 2014

Matte mix and match nails (blue, silver & white)

What I love about art in general is that you can get your inspiration everywhere.
Therfore my computer is like a huge Pinterest board.
Everytime I see an image that I like I save it somewhere on my computer and once in a while when I'm out of inspiration...I go through them and find something that I want to translate to my nail art.
I don't consider this stealing or copying but I do think it's decent to mention the source...
and that's where I fail.
I save the images as fast as I can using numbers or a letter and when I finally come to use them I don't even remember where I got it from.
So...I can only show you the images but sadly without a source.
Now, if you happen to be the owner of one of these images.
Consider my publication as a compliment.
You can always ask me to remove the image are mention your source/URL and I be happy to publish it :D
 
Here are today's inspirations:


I'm really in love with the jewelry above.
I love the ring and the bracelets and I love the combination of dark blue & silver (& white).
 
Here is my nail art:
 
 
Polishes used:
- Only You White French
- Maybelline 650 Midnight Blue
- Layla Mirror Effect Nail Polish 01 Metal Chrome
- China Glaze Matte Magic
 

Friday, November 22, 2013

Day 326) Matte abstract nails

Party time tonight!
I decided to make something simple and abstract because...well, I'm a woman and I need the rest of the day for making myself pretty ;D

I finished the look with a matte topcoat.
And, if you change the purple with gold this would be a great design for the Holidays.


Polishes used:
- Etos 124 (no name, teal)
- China Glaze 1252 Just be-claws
- Essence Beauty Beats 01 Baby, baby, ooh!
- China Glaze Matte Magic

Saturday, August 24, 2013

Day 236) Scrapbook nail art

I never did any scrapbooking...well let's say not on purpose anyway.
But I've seen scrapbook art that's truly art and I really like that.
 
Today's nail art is inspired by scrapbooking.
I used different techniques and products and tried to keep it pretty instead of a mess ;-D.


Friday, June 28, 2013

Day 179) Featuring rhinestones (2)

This is going to be a very short post.
The next three weeks I'll be posting from Portugal ;D
I'm not sure what these weeks will bring...blogwise that is.
I don't know if my Internet connection will be good enough.
I don't know if I will post 'single nail' nail arts.
But I do know that this is going to be very challenging period.
I have limited materials with me (base- and topcoat, striper brush, remover).
And I just want to enjoy my vacation and finally have some me (us)-time again.

Lovely readers...
Meet you again from Sunny Portugal!


Thursday, May 30, 2013

Day 150) Crackle nail polish

Blogging for a few months and never showed a crackle nail polish.
The big hype is over and it's on its return.
However, this is probably one of the easiest nail art that exists.
Today we went to an amusement park (called the Efteling).
And I'm tired and just want to go to bed.
Perfect day for a blogpost about crackle nail polish I think.

Crackle nail polish is available in many colors and from many different brands.
When you think about it, it is a brilliant concept. You paint it on, it cracks and you see the color that's underneath.
Crackle nail polish is perfect to use for the easy and fast nail art but what I especially like about it: You have to go out, but are wearing chipped nails...HELP...
NO! Just paint some crackle nail polish over it and...You're good to go!

I only own a silver crackle nail polish and I think this needs a dark background.
Yesterday I did some black nails, so I wanted something different for today.
I took my favourite colour and topcoated it matte:

W.I.C. by Herome Limited Edition Magical India - Jaipur + Miss Sporty - Check matte

When this dried, I simply applied the crackle nail polish:
Essence nail art cracking top coat - 04 Crack me! silver

I'm not really a fan. Are you?

Wednesday, May 29, 2013

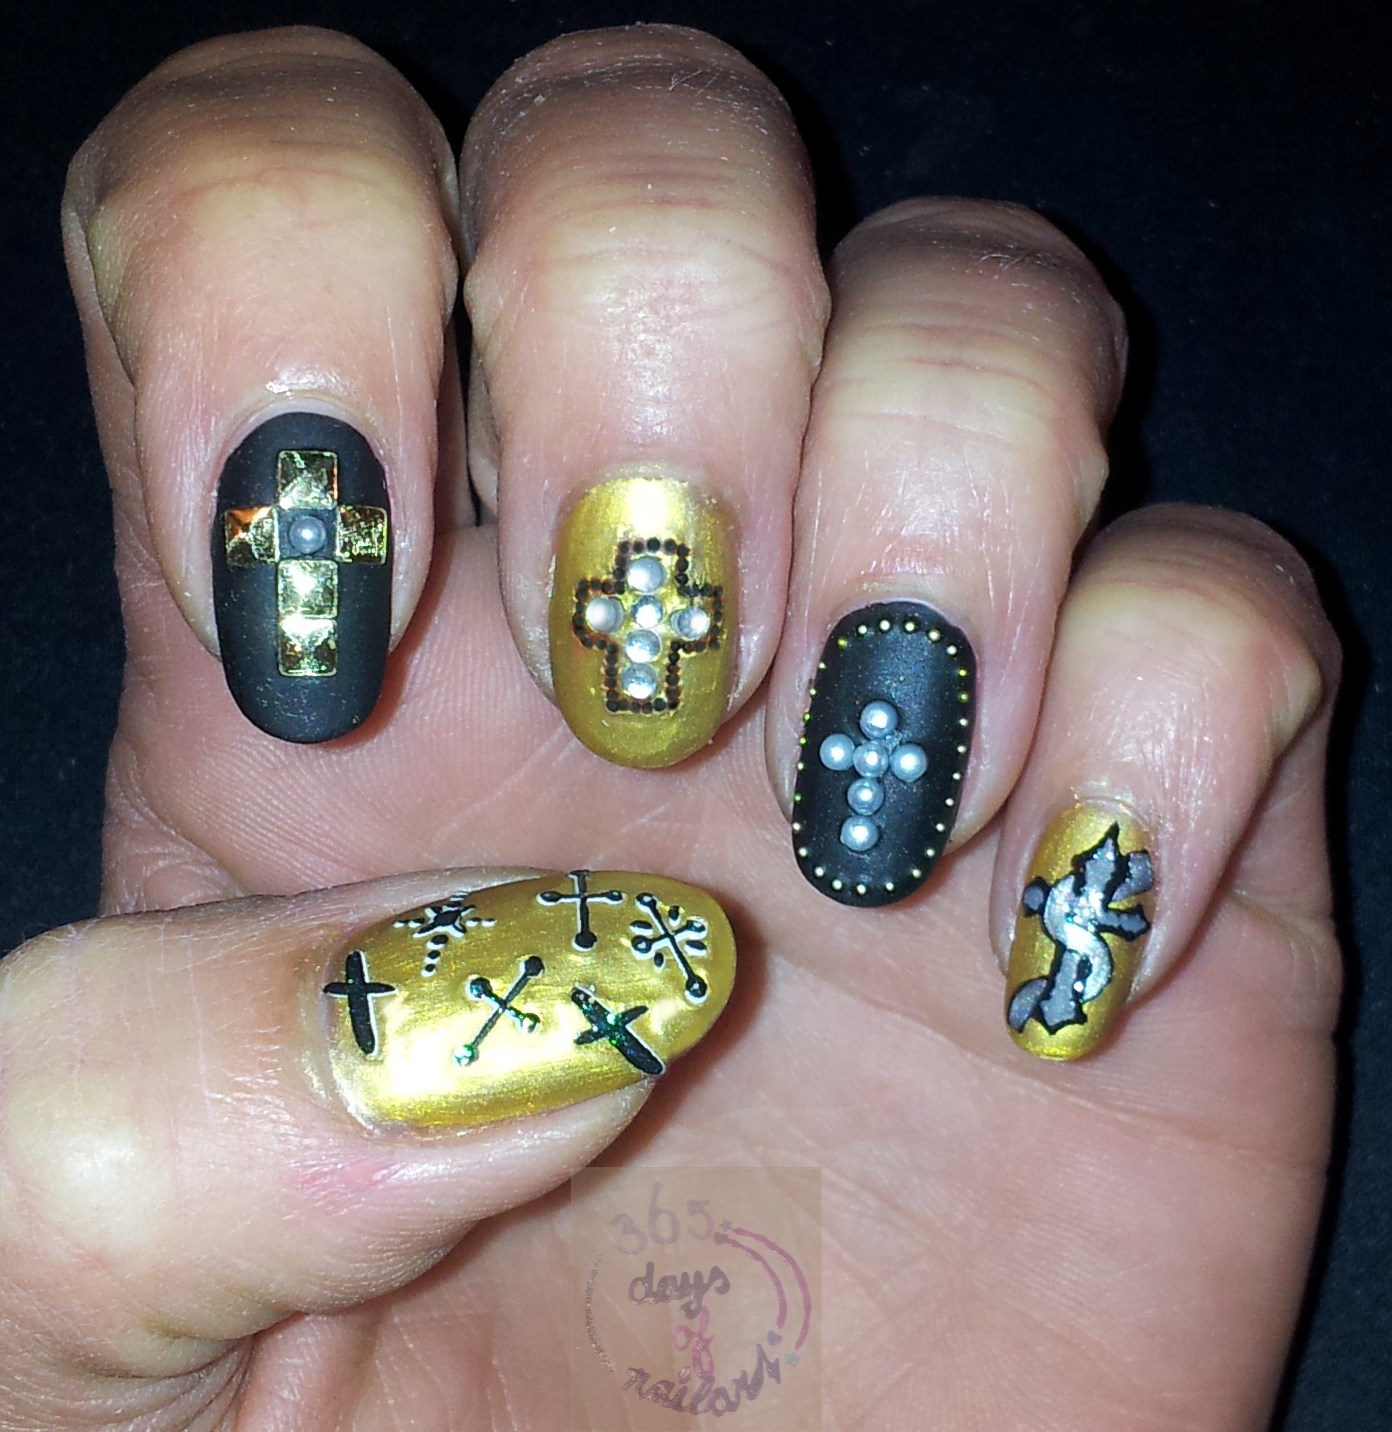
Day 149) Nail art crosses

I've had a request for nails with spikes today.
Only webshops provide these. So, that's an upcoming nail art.
However, I did immediately think about rock nails.
And there are always crosses on rock themed nails.
Today's nail art is only about crosses.


First I painted my nails with a gold and black nail polish. I finished them with a matte topcoat.

Thumb: Max & More (Action store) nail stickers
Index finger: Square studs and pearl
Middle finger: Rhinestones and black beads (on the picture the gold gives the beads an orange look)
Ring finger: An outline of golden beads and a cross made of pearls
Pinky: Striper brush design. I made the outer lines of the cross with a black nail polish. Then colored it with a dark grey. The snaky thing is in silver. (In real life there's a big difference between the grey and silver, but this doesn't show well on the picture)

Hope you like them!

Friday, May 17, 2013

Day 137) Nail art matte with pearls (white and colored)

Today was a day of many other commitments.
Not much time for a nail art or writing my blog.
So, today is a simple and easy one.

Here is the step-by-step:
1) After the basecoat, paint your nails black

2) Apply a matte topcoat

3) Put on another layer of matte topcoat and use this as a glue for your pearls

Too bad the colors on the pictures aren't the same as in real life. A matte black background with white pearls looks really classy! But the picture doesn't do it justice.

The nail of the ring finger is going to be my accent nail.
Some time ago I came around this idea and of course I'll have to share it with you too (credits for this person!)
Here is the step-by-step of my accent nail:
1) Get a piece of tape (picture 1) and make a circle with it, sticky side on the outside (picture 2)


2) Put the tape flat on a piece of a paper (picture 1) and place some pearls on the sticky tape (picture 2)


3) Paint the pearls with nail polish (different colors)

Let them dry and remove them from the tape. They are ready for use now!

4) Give the accent nail another layer of matte topcoat and use this as a glue for the colored pearls

Done!
Easy, simple and very nice for a party. Have fun!