Showing posts with label pink. Show all posts

Sunday, September 21, 2014

Jior Couture Collab Collection #AsYourIndieMakerICommandYou (part 3)

Today I bring you the third lacquer of the very limited collab collection by +Jior Couture called #asyourindiemakericommandyou.
This collection is available in store on September 27th.

More info about this collection and the other lacquers can be found at part 1 and part 2.

Next sentences are 18+


Today's polish is called Suck Me, Vampire Barbie
True Blood quote:
Pam De Veaufort: "Just because we drank a b*tch together does not make us Oprah and Gayle. Get the f*ck back to work."
Tara Thornton: "Suck me, vampire Barbie!"
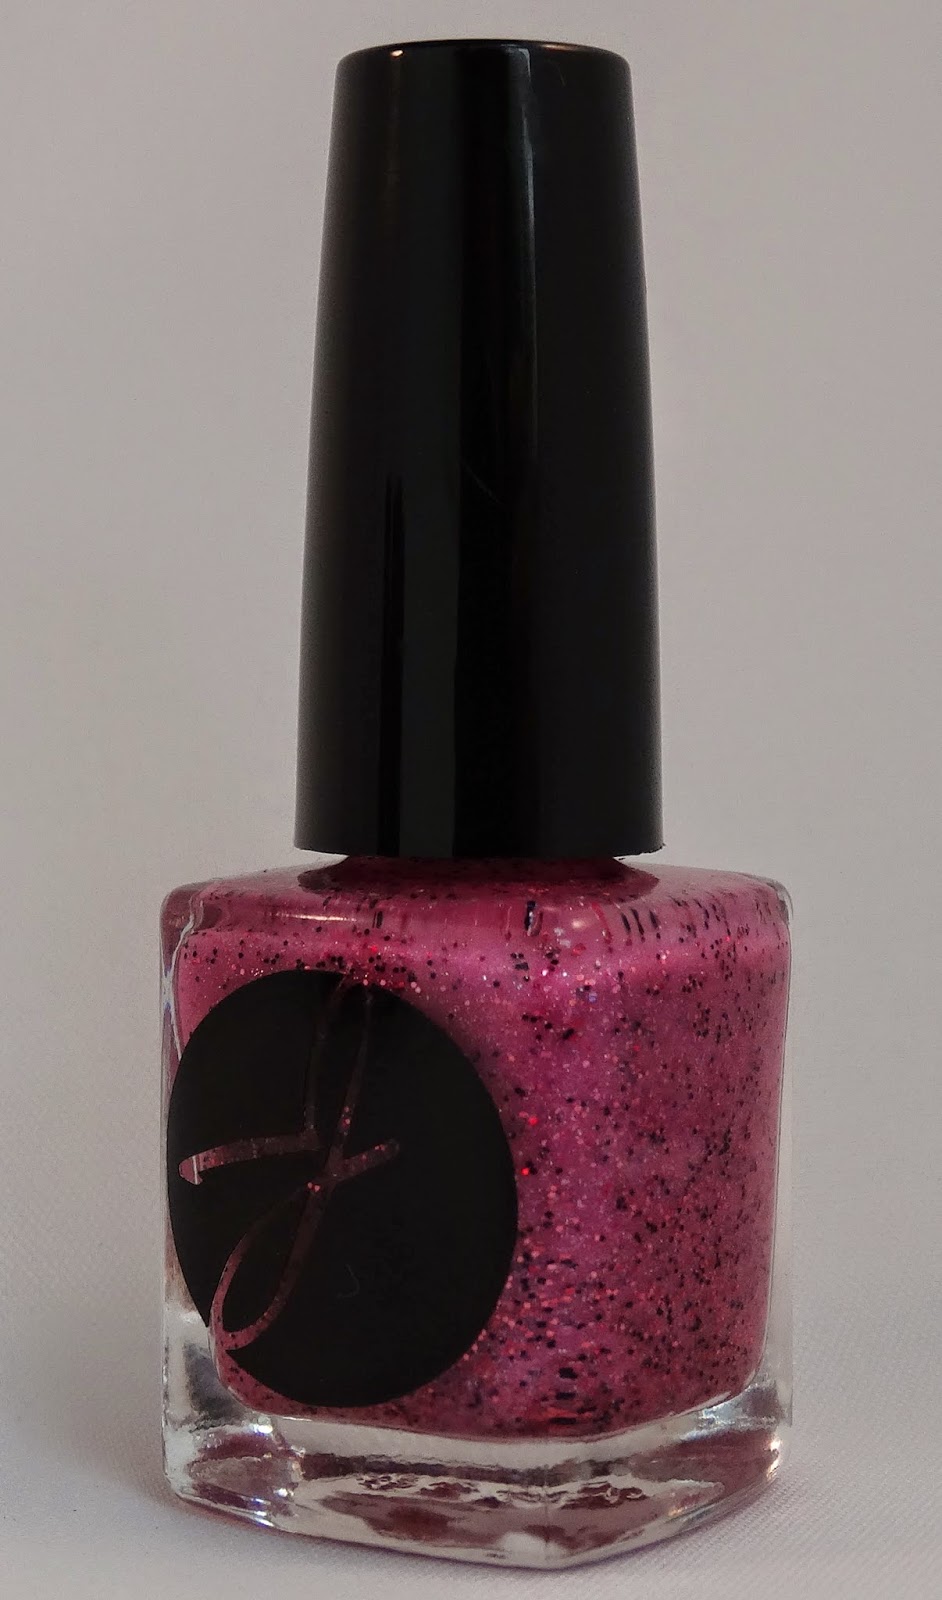

Suck Me, Vampire Barbie has a pink base filled with pink, black and holo micro glitter.
Coats suggested: 2-3
Finish: A bit textured.
Pictures of swatches show 3 thin coats and no topcoat.
Pictures of nail art show 3 thin coats + topcoat.

Swatches


Picture taken in light box with flash.


Picture taken in light box. No flash.

I'm not really a "pink" girl, 
It's a color you won't see on my nails that often.
This one is an exception though. 
I like that it is a more rough version with the black micro glitter and soft textured finish.
And of course the holo micro glitter is right up my alley :-D

Nail art

For this nail art I simply used the polish name as my inspiration.
Index: "Suck Me" (Vampire font)
Middle: "Vampire" (Vampire font) and fangs
Ring: Corset inspired design
Pinky: "Barbie" (Barbie logo)

I have 2 pictures of my nail art. Second one shows the nail art best but the color of the polish isn't really representative anymore.

Picture taken in light box. No flash.

Picture taken in light box with flash


Friday, October 4, 2013

Day 277) Breast cancer awareness month

October is Breast Cancer Awareness Month (BCAM).
Breast cancer is the most common type of cancer among women.
Main goal for this month is: Increase awareness of the disease and raise funds for research into its cause, prevention, diagnosis, treatment and cure.
The campaign also offers information and support to those affected by breast cancer.
And I guess we are all thinking about the people we already lost due to this disease.

To increase awareness I think it's my duty to make some nail arts for this cause.
Therefore some pink designs, pink ribbons (breast cancer symbol) will be here this month.

For today's nail art I used a pink ribbon as the body for a butterfly:


Used polishes:
- OPI Couture de Minnie A Definite Moust-Have (pink)
- OPI Couture de Minnie Chic from Ears to Tail (light pink)
- Goodmark Nail Enamel B13085 (white)

Wednesday, August 28, 2013

Day 240) Abstract nails (pink, purple, white)

Have you been noticing that I like abstract nails...?
After doing some other nail arts I'm burning to do another abstract.
 
And here it is:

Tuesday, May 28, 2013

Day 148) Summer nails (watercolor technique)

Yes, we finally had two days of summer weather and now we're back at rain again.
But for today it felt like summer.
So, here is an idea for summer nails.

Step-by-step:

Step 1:
After the basecoat apply a light colour. I used a light yellow one because of its coverage (only 1 coat!)
Catrice Soft Nail Lacquer Limited Edition Candy Shock - C04 Vanilla Love

For the next steps...first a pic of the material used:

  • Tape
  • Konad stamping promotion kit
  • Grip seal bag/ zipper bag
  • Scissors
  • Catrice Ultimate Nail Lacquer - 02 Pimp My Shrimp
  • Catrice Ultimate Nail Lacquer - 27 The Pinky And The Brain
Step 2:
While your base colour is drying, use the tape for covering cuticles and fingers.

Step 3:
Take the scissors and cut the grip seal bag into pieces (bigger than nailsize)
Step 4:
Apply some drops of nail polish (mentioned at material) on to the nail
Step 5:
Take a piece of plastic (from your grip seal bag) and gently place it on your nail. Give it a little push without moving it around. Then remove it again by carefully lifting it up from the nail.


 Step 6:
Remove the tape from your fingers and clean up any mess.
Step 7:
To add some extra 'summer' detail I used the Konad stamping kit for stamping the two butterflies on to the nails.


Bright and lovely, what do you think?

Thursday, May 2, 2013

Day 122) Water spotted nail art with perfume

I came along this nail art and I just have to share it with everybody!
It's easy and it looks fantastic!

I saw some YouTube tutorials about it and I've seen people doing it with hairspray and sanitizer spray. I tried both but it didn't work for me. It either made too big spots or it clotted together as a sticky black mess.
After several times of trying my eye catched a perfume sample and I thought: "Let's give it a try maybe that will work". And it works!!!

Materials:
- Bright colors nail polish (at least 3)
- Black nail polish
- (Tape)
- A cup or something which you can use for water marbling
- Perfume (perfect way for using the samples or perfume you didn't like or use the one owned by
  your signifant other ;-D )
- Nail polish remover

Step-by-step:

1) Paint your nails with the bright colors.


I used pink, yellow, blue and orange to devide the nail in 4 parts and then added some purple.
I did use a topcoat (for the picture) but I don't think this is necessary yet.
If your cuticles are a mess right now don't clean up you'll have to do that later on anyway.
Let the nail polish dry.

2) Use the tape on your fingers if you want to decrease the cleaning later on.

3) Fill your cup with slightly warm water from the tap.


4) Drop the black nail polish on the surface of the water: 3 or 4 drops should be enough.


The nail polish has to spread on the surface. If it doesn't you either have to adjust the temperature of the water or get a newer polish.

5) Spray your perfume on the surface of the water. Start a little high with spraying and wait a few
     seconds to see if there is a reaction.
    If not. Get a little closer and try again. A max of two sprays should be enough for a nice spotted
    design.


6) Choose the spotted area you like and dip your nail on it (flat)
    Then move the finger slowly forwards in the water.
    Use a toothpick or something to remove the excess polish from te water (around your finger).
    And carefully lift your finger out of the water.

After each nail dip there will still be some perfume left on the surface of the water. Therefore I recommend that you clean your cup after each nail dip. You don't want the reaction with the black nail polish as soon as you drop it on te water but after spraying.
By cleaning I mean putting the cup under the running tap for a few seconds.

If you finished all your nails this will be the look you'll have:


Note: When you spray once you'll have smaller dots but I wanted the bright colors to have the lead not the black.

7) Remove the tape and clean your skin and cuticles with the remover.
    Wait for the nail polish to dry and finish it with a topcoat.
    DONE!


I love it! These are hot summer nails

Let me know if you ever tried it or going to try this.
What did you use?
Did it came out the way you wanted?