Showing posts with label tigerprint. Show all posts

Monday, June 17, 2013

Day 168) Nail art with colored sand

Nails with texture are hot.
There are nail polishes that contain texture within themselves, for example Liquid Sand by OPI
But there are also brands like PUPA which have a nail art kit for texture; Pupa - Crazy Crystals.
This kit contains:
- Lasting color nail polish
- Crazy Crystals
- Mini brush
- Tray
Both the textured nail polish and the texture kit are rather expensive.
At least too expensive for me...for I only use it ones or twice.
I like to think outside the box and look for cheaper alternatives.
And...I think I've found it!

At the local drug store, but I think you have better luck at a craft or toy store, I found this kit:
Grafix - Sand Bracelets


This kit contains:
- Plastic bracelets which can be filled
- Colored sand
- Mini funnel
 

Of course I'm not interested in the bracelets, but I do have interest in the colored sand. Especially for the price of €1,49 (1,99 USD).

For today's nail art I've used the colored sand from this bracelet kit.
I only did two nails, for I don't like the removing of this textured nails (and my middle finger nail broke aaarggggghhhhh).
The other nails I painted purple; Essence Colour & Go - Oh my glitter!

The sand nail art is pretty simple too.
I used a striper brush and basecoat to make stripes on the nails (one by one and alternately starting from different sides of the nail, like a tigerprint).
Then I applied the sand, shaked some excess off and gave it a blow.
...Next stripe, sand, shake it off, blow...
...Next...and so on
The colors are bright and you can see the sand texture very well. Of course this is easily damaged because of the texture. So, if you want it to last, you'll have to apply a topcoat:
The sand texture is less visible and the colors are less bright, but it does look more like the liquid sand nail polishes.
To give it a little extra, I added some tiger stripes to the sand nails. I used a black striper for this:

I'm very pleased with this sand. I think it's a great, cheap alternative to the more expensive liquid sand and textured kits!

Wednesday, May 15, 2013

Day 135) Abstract magnetic nails

I finally got the Pupa Magnetic nail art kit.
Yes, I know it's not new anymore and it has been reviewed many times before.
The reason why I didn't get it earlier is that I was wondering for a very long time if it is worth the money.
I've been using lowbudget magnetic kits and although they are not great, they are just fine for the few times that I use it. Future plans are to make my own magnets and I do want a good magnetic nail polish for this; this is where Pupa comes in.

First a picture:
These kits are available in many colors, but I got number 31 Magnetic Black (which is on the picture above).
The kit contains a magnetic nail polish en two magnets: one for horizontal stripes and one for diagonal stripes.
I'm not going to do an extensive review about it.
The magnetic nail polish is of high quality and is also great to use without any magnetic interference.
The magnets were another thing:
-The opening for the finger is too small. You can't get your finger in which gives you the feeling that you don't have overall control. But it isn't really a problem, it's just the feeling.
- First use I didn't get a design at all. Too far of the nail. Then I realized that there is a small ditch in the magnet on which you can let your nail rest. This is just the right distance between magnet and nail.
- When the distance to the nail is right the design appears in a few seconds

Of course I wanted to do a nice nail art with this kit and here is the step-by-step:

1) After the basecoat paint your nails in a white colour. Then apply a topcoat.
Let it dry for some time (in my case it 's been 3 hours, but you don't have to wait this long).

2) Apply tape on the sides of the nails leaving a free of tape part in the middle (picture 1). The ring finger is my accent nail on which I simply apllied some different shapes of tape randomly (picture 2).


3) For this step you need to work nail by nail.
Paint your nail with the magnetic nail polish and immediately use a magnet or magnet pen (I used both).
The magnetic nail polish is quick drying. When the polish is dry the magnetic parts can't move around anymore, so that's why you'll have to work fast. On the thumb for example I did some dots and half way the nail I had to apply another layer of polish on that half because it already was too dry!


> Paint your taped nail with the magnetic nail polish


> Make your design with a magnet or magnet pen.
   On this picture: dots with Essence magnet pen (thumb)


> Swirl with Essence magnet pen (accent nail on ring finger)


4) Remove the tape and correct some imperfections
I used a topcoat and afterwards I regret doing this. It makes the magnetic designs less visible.
Maybe I did it too early or maybe you're not supposed to use any topcoat. If anyone knows, please let me know!

Thumb: Dots with Essence magnet pen
Index finger: Tiger print with Essence magnet pen
Middle finger: Diagonal stripes with Pupa magnet
Ring finger: Swirl with Essence magnet pen
Pinky: I did the horizontal stripes with the Pupa magnet but my topcoat completely ruined it. So, I applied some magnetic nail polish again and made some horizontal stripes with Essence magnet pen

This isn't my best nail art for sure, but I do think the overall look is okay.
What do you think?

Saturday, April 27, 2013

Day 117) Kingsday nail art

Today is Kingsday in the Netherlands.
Not official yet because the crowning is on Tuesday when it's Queensday.
It's been a while since we had a king so everybody is very excited and already celebrating this day.

For this day I have to do some national nail art.
Less interesting for you guys....??
No! You can still use the designs in different colours or make your own national nail art with it.


 These colours are my base for the nail arts.
N.B. Our flag contains red, white and blue and the colour we use at special events like the Olympics, Queensday is orange.

1)


I started with some randomly placed red dots. For this I used a dottingtool. After the reds I did some orange dots and finished it with some blue dots. Outcome: Dutch confetti

2)


First I made a gradual design with white on the middle of the nail.
I do this because my red and blue aren't good for 1 coat. At least not when they are applied on darker colours like the orange.
The first step gets a red colour. The second a white and the third a blue colour. I like to give my designs some golden accents because of the king/queen. But it also gives the opportunity to disguise some failures.

3)


Start by making a crown.
Make two ribbons underneath the crown.
Give the ribbons the colours of your flag.
I detailed the nail art by giving the crown some gold (bottom) and gold glitters (outlines).

4)

For this design I simply used the same technique as you would do to make a tigerprint.
Place stripes alternately. Starting thicker on the outside and thinner at the inside.

5)


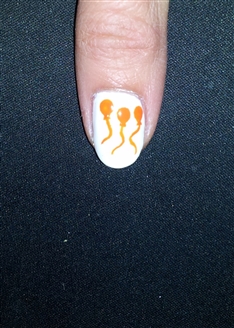
Start by making some balloons.
Then give the tip of the nail your flag colours by using something simple to apply (beads/billions/caviar, velvet or in this case glitters).
Use a brush to paint one stripe of clear coat on the desired place. Glitter it. Then apply the second stripe of clear coat and glitter it. Do the same for the last colour.

Total look for Kingsday