Showing posts with label Christmas nail art. Show all posts

Tuesday, December 23, 2014

And a Very Merry Christmas Tree

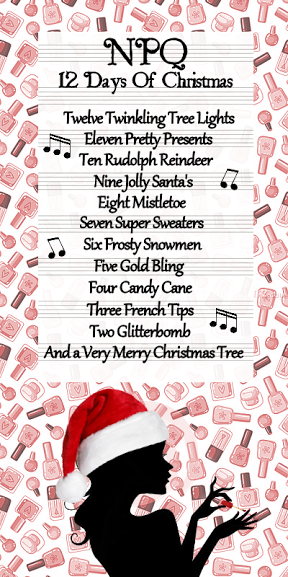
On the 1st day of Christmas NPQ gave to me...


A Very Merry Christmas Tree


The challenge has come to an end (as all good things come to an end!).
And I am really, really glad that I've managed to pull it off.

I wish you a very merry Christmas!!
May you receive love and give love as it is the most important thing in life!! ♥


Friday, December 19, 2014

Three French Tips

On the 3rd day of Christmas NPQ gave to me...


Three French Tips


Lacquers used:
- Anny Sunset Love (red)
- Essence Hup Holland Hup Hattrick! (white)

Monday, December 15, 2014

Five Gold Bling

On the 5th day of Christmas NPQ gave to me...


Five Gold Bling


Five Gold Bling:
1) Gold champagne glasses (water decals that I received from my dearest friend +bubica vucko )
2) Gold Christmas ornaments (small gold hexes and gold chain)
3) Gold Christmas sock (polish+iredescent flitter)
4) Gold heart shaped nail piercing
5) Gold Christmas tree (gold caviar/nail beads and gold star stud)


Tuesday, December 24, 2013

Day 358) Easy Christmas nails

Hi all,

In exactly half an hour my family comes over for a Christmas party.
Not much time to blog or make a nail art today.
Therefore I kept it really simple.

On the index finger, middle finger and pinky:
- China Glaze 1252 Just Be-Claws
- Essence Metal Glam Gold Topper

On the accent nail (ring finger):
- China Glaze 1117 Angel Wings
- Water decal Santa


Merry Christmas!

Monday, December 23, 2013

Sunday, December 22, 2013

Day 356) Merry Christmas

Maybe just a few more Christmas nail arts and then I'll be doing New Years nail arts.
Counting down now...almost reaching my GOAL and achieving my wonderful challenge!
Hopefully you'll be there with me on the 31st!

Thank you so much for following!

But first things first. Here is another "Merry Christmas" nail art

 
Polishes used:
- China Glaze 1261 This Is Tree-Mendous
- Rimmel Salon Pro 323 Riviera Red
- Only You White French
- Catrice Ultimate Nail Lacquer 39 Black To The Routes
 

Saturday, December 21, 2013

Day 355) Christmas nails with subtle 3D

This week's challenge is "3D Chrismas nails".

Although I like the 3D accessories on others, it's not really my thing.
I keep touching it and within a few minutes my mani is already ruined.

In the Netherlands we also have a saying: When you're acting normal, you're already acting weird enough.
Which means that over the top bling is considered to be more trashy than classy.
Not that I care :D but like I said it's just not really my thing...practical wise.

Therefore I've made some Christmas nails with subtle 3D


Thumb: Candy striped nail with nail piercing (star)
Index: Rudolph with rednose rhinestone
Middle: Christmas tree created with striping tape, star stud and beads (caviar)
Ring: Christmas wreath created with green velvet (flocking powder), beads and fabric bow
Pinky: Santa hat created with red velvet and rhinestone. Above Christmas lights with rhinestones.

Friday, December 20, 2013

Day 354) Easy Christmas nails

Who says creating something a bit more special for Christmas needs to be hard?
Not me ;D
Especially towards the holidays you can get craft stuff for Christmas at many stores.
Products like glitters, flitters, stars, mini snowmen, stickers etc.
All you got to do is look with a creative eye and as long as it fits the nail it will be fine.

Today I created some nails with these kind of products.
Paint your nails in the same or other color and use the wet polish as glue for your accessories.
Additionally: Add a topcoat.
DONE!

Artificial light
 
Natural light

Thursday, December 19, 2013

Day 353) Nail art Christmas Angel

Today just a quick post of my nail art.
 
 
Polishes I used:
 
- Catrice Ultimate Nail Lacquer 39 Black To The Routes (base and lines angel)
- Only You White French (angel wings, dress and stars)
- Claire's 60484 Glitter Pink/Purple (sides dress, sky)
- Essie Beyond Cozy (dress, crown, sky)
- Professional Cosmetics nr. 11 (angel hair)
- Essence Me & My Ice Cream 04 Icylicious (skin angel)
 

Wednesday, December 18, 2013

Day 352) Reindeer nail art

This nail art isn't actually so hard as it looks.
Silhouettes are much easier to paint than full detail images.

Polishes used:
- Rimmel Salon Pro 323 Riviera Red
- Claire's 60553 White
- Maybelline Forever Strong Pro 720 Green Miracle

Tuesday, December 17, 2013

Day 351) Star jelly sandwich nails

I saw this technique before with some glitter shapes and it just looked like the jelly polishes you can buy that have already glitters in them.
Although it looked like a cheaper alternative to buying a jelly glitter polish it didn't really catch my attention.
But a few days ago I saw this beautiful tutorial by Denise Heavner
She used stamps between the layers of jelly polish and this had to be something I needed to try as well.

First problem:
I have only 3 tiny stamping plates with designs that just don't fit this time a year.
But after some consideration I thought the star would be best.
Second problem:
I don't own any jelly polishes.
In my head: Everything that doesn't cover within 3 layers is a waste of money.
But after taking a good look at my stash I did find an apple green glitter polish that doesn't cover at all: Actuelle 472 Perolado

Material:
- Jelly polish (or not opaque polish)
- Stamping plate
- Stamping polish
This design is with stamping but you could also put glitters, flitters, handpainted nail art, decals etc. between the layers.

Stap 1:
After the basecoat apply one layer of your jelly polish.
To speed up the drying time I've used a topcoat on each layer of jelly.
Step 2:
Stamp some designs on your nails (you can use different designs, different colors, just as you please).
I started with white stars.
Step 3:
Apply another layer of your jelly.
Step 4:
Again stamp some designs.
This time I stamped red stars.
Step 5:
Apply another layer of jelly.

Depending on the sandwich effect you please or how thick your jelly is, you can either stop with 2 times stamping or go for more.

I've decided to do another layer.
Step 6:
Stamp some designs.
I've stamped gold smaller stars. However in the picture this doesn't show but in real life the gold stars are shown as well.
Step 7:
Apply the finishing layer of jelly and a topcoat to protect the whole thing.

Because of the many layers and the many layers of topcoat I already had some shrinkage at the tips.

Good luck! The effect is amazing!
Here is my outcome:


Monday, December 16, 2013

Day 350) Mickey Mouse Christmas nail art

Day 350!
I can't believe I'm almost there!
Only 15 days left and although I know these days will fly by it feels real heavy.
Not only because it's going to be hard to fit those nail arts in my busy days but also because it's the end and it already feels a bit like a goodbye.
I know I will still be around but I promised my dear ones to take a break and I really have to keep this promise.

Saving the tears for later ;D
Here is today's nail art. Inspired by an image I found on the Internet.

Have a Merry Mickey Christmas


Sunday, December 15, 2013

Day 349) Easy Christmas nails

For today an easy nail art.

Material:
- Golden polish
- Matte topcoat
- Nail art brush
- Red glitter
- Green glitter
- Brush
- Squared rhinestone

Step 1:
Start with applying the golden polish: Catrice Ultimate Nail Lacquer Limited Edition Feathers & Pearls C02 - Golden Twenties

Step 2:
Apply matte topcoat (of course you can skip this step): China Glaze Matte Magic

Step 3:
Make sure that everything is dry.
Use a nail art brush and (matte) topcoat to create your glitter area; the topcoat is for glue.
Drop some red glitter on the nail and remove excess with a brush.

Step 4:
I already like it! Option is to keep it like this.
Again use the nail art brush and topcoat to create your next glitter area. Apply the green glitter and remove excess with the brush.

Step 5:
Optional.
Apply a little dot of topcoat at the centre point of both glitters and apply a (squared) rhinestone.
Have fun!

Saturday, December 14, 2013

Day 348) Little drummer boy nail art

This week's challenge is "Christmas songs".

First a little story again:
My parents had their own store and worked like 6 and a half days a week.
The whole month of December was a crazy period; my birthday, Sinterklaas, Christmas, my parents their birthday, ice skating, fireworks, New Year, accounting etc.
But Christmas time (which is for the Netherlands on the 25th and 26th) was for the family.
Two days of no work, presents, playing family games, watching Christmas movies and going to church.
I guess this is why I'm still loving this time a year: family time, showing each other your love, feeling some kind of inner piece.

What was I going to tell?
Oh yeah, my mother sings in a church choir and at Christmas time they sing Christmas songs in church. Some only with the choir, some with all the people.
I enjoyed going to church with Christmas time. That huge Christmas tree in the centre, all the big candles, the beautiful windows, the harmony between the people and singing songs together.
I then fell totaly in love with "THE LITTLE DRUMMER BOY" (Carol of the drum).
Pa rum pum pum pum


When the choir sings, it looks a lot like this version above.
I love it so much! Also the story behind it and the lesson people can learn.

I wanted to honor this story and this song and the best memories it has given me by making a lovely nail art.
This has been quite a challenge and it took me about 3 hours to make it. I'm not good at painting human beings.
All that time I've been listening to this song and other Christmas songs ♥ (There is a 3 hour playlist of Christmas songs on YouTube!).

Hope you love this nail art as much as I do!

Wednesday, December 11, 2013

Day 345) Nail art Christmas gift

For today's nail art my inspiration was "Christmas gifts".

The middle finger, ring finger and pinky have a gift ribbon design. At the crossing of the ribbons I've painted a poinsettia.

The index is my favorite.
As inspiration I've used a cut-paper work design (cut art).
It existed of two pieces of paper, different color. One is used as base, the other is used for cutting.
The cut paper design then is placed on top of the other paper, making it somewhat 3D. Sometimes 3D pieces are also applied to increase the effect.

I used almost the same design as I've seen, but sized to finger nail and a little simplified.
This is all hand painted and perhaps you think you'll never be able to do this.
Well, I thought about that and came to the idea that you could stamp on your base first and only have to paint the outlines and cross of the gift or just a cross if you're making a window.