Showing posts with label swirl. Show all posts

Friday, May 24, 2013

Day 144) Nail art mosaic

Besides the nail polish racks I own, I also have a drawer unit for my nail art related stuff.
Once in a while I have to reorganize these drawers because I don't even know what I've got anymore...and they won't close ;D
When I was reorganizing today I found my crushed shell again and immediately decided I had to do a nail art with this.
But what? I looked at the little pieces and they reminded me of mosaic tiles.

So, mosaic it is!

Materials I used:
- Crushed shell (different colors)
- (Pearly) white nail polish
- Rhinestone picker (I have one with a sticky ball at the end. So you can pick up anything you like with it, as long as it isn't too heavy)
- Small dottingtool

Step 1) After the basecoat I applied some white nail polish on just a little part of the nail. A little part, because this is going to be your glue and when you paint your whole nail it will be dry once you get there. I used a small dottingtool for applying, but you can also use a small brush or something.
Step 2) Pick up a little piece of crushed shell with the rhinestone picker and place it on the desired spot. For a nice and longlasting outcome, I recommend you use the flattest pieces of crushed shell. I used the other side of my rhinestone picker to give the pieces an extra push into the nail polish.
Step 3) Make any design you like. I'll have to say it's very time-consuming, but so is a 'real' mosaic.


I was afraid a topcoat might ruin it, so I used KOH DRY DROPS! instead. One drop and your nail polish is dry within the minute. It also contains Aloë Vera and Vitamin E for the cuticles. My hands were really dry and they LOVE the Koh drops. I did put another drop on the hands as well, that's why my hand is oily.

Here is another picture without the oil ;D

Thumb: mix of colors (not so interesting)
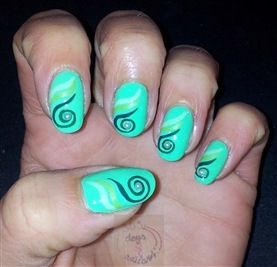
Index finger: swirl
Middle finger: 3 flowers
Ring finger: rings, circles
Pinky: horizontal lines

Thursday, May 23, 2013

Day 143) Simple elegance in greens

Tired and low on inspiration.
So, today's nail art is a simple one.

1) After the basecoat I painted my nails with 2 thin coats of Bourjois 1 Seconde - No. 27 Green fizz

2) Then I used a striper brush and a light green colour to make a wavy stripe (picture 1)
I repeated this step with a little darker green underneath the light one. Again a wavy stripe (picture 2)
1)

2)

3) Then I did a last wavy stripe with dark green underneath the second wavy stripe, only this time I made a swirl at the end

4) To give the nail art some more elegance I placed half pearls in the centre of the swirls. As glue I used my topcoat


For sure not my best nail art. But everybody has an off-day once in a while...today is mine.
I do like the colors though; great for summer!

Thursday, May 16, 2013

Day 136) Dotted nails Rainbow

The weather is terrible in The Netherlands.
Nothing but rain, rain and more rain.
Time to compensate these dark days with of course a multicolored nail art: a rainbowy nail art to be precise.

Today I don't have a step-by-step.
I used a white nail polish as background for my nail art.
And for the artistic part I used only a dottingtool and a lot of nail polish colors ;-D


Some extra info that might be useful:
-On the ring finger I did an outline of rainbow dots
-On the pinky I placed dots that I pulled with my dottingtool into a teardrop shape. The pulling of dot into teardrop shape can also be done by using a wooden stick or something like that.

Hope you like it!

Wednesday, May 15, 2013

Day 135) Abstract magnetic nails

I finally got the Pupa Magnetic nail art kit.
Yes, I know it's not new anymore and it has been reviewed many times before.
The reason why I didn't get it earlier is that I was wondering for a very long time if it is worth the money.
I've been using lowbudget magnetic kits and although they are not great, they are just fine for the few times that I use it. Future plans are to make my own magnets and I do want a good magnetic nail polish for this; this is where Pupa comes in.

First a picture:
These kits are available in many colors, but I got number 31 Magnetic Black (which is on the picture above).
The kit contains a magnetic nail polish en two magnets: one for horizontal stripes and one for diagonal stripes.
I'm not going to do an extensive review about it.
The magnetic nail polish is of high quality and is also great to use without any magnetic interference.
The magnets were another thing:
-The opening for the finger is too small. You can't get your finger in which gives you the feeling that you don't have overall control. But it isn't really a problem, it's just the feeling.
- First use I didn't get a design at all. Too far of the nail. Then I realized that there is a small ditch in the magnet on which you can let your nail rest. This is just the right distance between magnet and nail.
- When the distance to the nail is right the design appears in a few seconds

Of course I wanted to do a nice nail art with this kit and here is the step-by-step:

1) After the basecoat paint your nails in a white colour. Then apply a topcoat.
Let it dry for some time (in my case it 's been 3 hours, but you don't have to wait this long).

2) Apply tape on the sides of the nails leaving a free of tape part in the middle (picture 1). The ring finger is my accent nail on which I simply apllied some different shapes of tape randomly (picture 2).


3) For this step you need to work nail by nail.
Paint your nail with the magnetic nail polish and immediately use a magnet or magnet pen (I used both).
The magnetic nail polish is quick drying. When the polish is dry the magnetic parts can't move around anymore, so that's why you'll have to work fast. On the thumb for example I did some dots and half way the nail I had to apply another layer of polish on that half because it already was too dry!


> Paint your taped nail with the magnetic nail polish


> Make your design with a magnet or magnet pen.
   On this picture: dots with Essence magnet pen (thumb)


> Swirl with Essence magnet pen (accent nail on ring finger)


4) Remove the tape and correct some imperfections
I used a topcoat and afterwards I regret doing this. It makes the magnetic designs less visible.
Maybe I did it too early or maybe you're not supposed to use any topcoat. If anyone knows, please let me know!

Thumb: Dots with Essence magnet pen
Index finger: Tiger print with Essence magnet pen
Middle finger: Diagonal stripes with Pupa magnet
Ring finger: Swirl with Essence magnet pen
Pinky: I did the horizontal stripes with the Pupa magnet but my topcoat completely ruined it. So, I applied some magnetic nail polish again and made some horizontal stripes with Essence magnet pen

This isn't my best nail art for sure, but I do think the overall look is okay.
What do you think?

Friday, April 26, 2013

Day 116) SmART nails N019


SmART nails stencils are available in a lot of different designs.
I chose this one because it's hard to do this design by hand and have the same perfect outcome.
Note: Before you do any stencil or tape mani keep in mind that the colour you used as a base should be completely dry. When this is not the case you wil ruin your base colour by pulling some of it off with your stencil or tape. I recommend you paint your nails in the desired colour at least a few hours before you will do a tape or stencil mani (or have a very good fastdrying topcoat).
Before use make sure that you'll reduce the intensity of the glue by sticking the stencil (or tape) a couple of times on some skin or fabric.
Then put the stencil on the desired place and make sure it's flat and touches the nail well.
Apply the nail polish and remove the stencil immediately. Apply topcoat. Done!

I have 5 different designs for you:


1)


2)


3)


4)


5)


And this is the total look:


I used a lot of colour. But if you use only black and white or maybe some red you can get a very classy look.