Showing posts with label moon. Show all posts

Sunday, November 17, 2013

Day 321) Nail art star and moon

Today I just want to show one of my favourite glitter polishes for the Holidays (read: any Holiday).
Therefore the nail art is secondary but still tried to make something cute though.

China Glaze - Marry a Millionaire (3 coats)

Marry a Millionaire is a clear polish richly filled with different glitters.
There are purple and pink microglitter and a lot of multicolor/holo bar glitters.
This mix constantly changes in every different light, room, environment and you get totally lost in it...as does my camera ;P
Applying is quite easy as it spreads evenly and you don't have to fish for glitter.
Opaque wise it needs at least 3 coats (see picture above) but 4 is the best.
If you leave some drying time in between the coats (few minutes) you'll get the best outcome and easiest way for applying.
This nail polish is very suitable for a party or Holidays!!

Saturday, November 16, 2013

Day 320) Bright December moon is beaming...

Today Sinterklaas had his arrival to the Netherlands.
We've been watching a bit on TV and went to town to see his arrival there as well.
I couldn't go without Sinterklaas nails.
So here is another Sinterklaas nail art.
This one is inspired by a Sinterklaas song the children sing.

I have a quite literal translation of this song in English:

See the moon shines through the trees,
Mates, stop your wild roars.
The delightful evening has arrived.
the evening of Sinterklaas.
Full with expectations beats our heart,
who'll gets the cake, who'll gets the whisk.
Full with expectations beats our heart,
who'll gets the cake, who'll gets the whisk.

But a more correct translation would be (according to an English digital school):

Bright December moon is beaming
Boys and girls now stop your play!
For tonight’s the wondrous evening,
Eve of good St Nicholas Day.
O’er the roofs his horse unshod
Bring us gifts or else the rod.
O’er the roofs his horse unshod
Bring us gifts or else the rod.

Well, enough about the song.
I've painted an evening with moon and tree and houses.
This is simular to the images that go with the song.

Sunday, September 29, 2013

Day 272) Nail art Halloween

Today the first Halloween nailart.
Halloween is actually something we don't really know in the Netherlands.
Except from some movies on TV and some stuff you can buy at stores it is a day that passes just like any other.
A part of the Netherlands does celebrate Sint Maarten which is November 11th.
Children go by people's doors holding a lampion/lantern (which used to be a pumpkin with candle, nowadays it's a paper thing with battery light) and they have to sing a song.
After finishing the song they will receive a treat (this used to be a penny or fruits, nowadays it's candy).
 
Blabla blabla.
Let's get to the nail art!
 
What's there to see:
- Starry sky
- Clouds
- Moon
-Bats
- Castle towers


Thursday, April 25, 2013

Day 115) Nail art day & night


Today was a very nice day.
The weather reminded us of the Summer that's going to come.
I spent the day sitting in my backyard while the kids were playing with water and sand.
Tomorrow it will be a lot colder and we will even get some rain again.
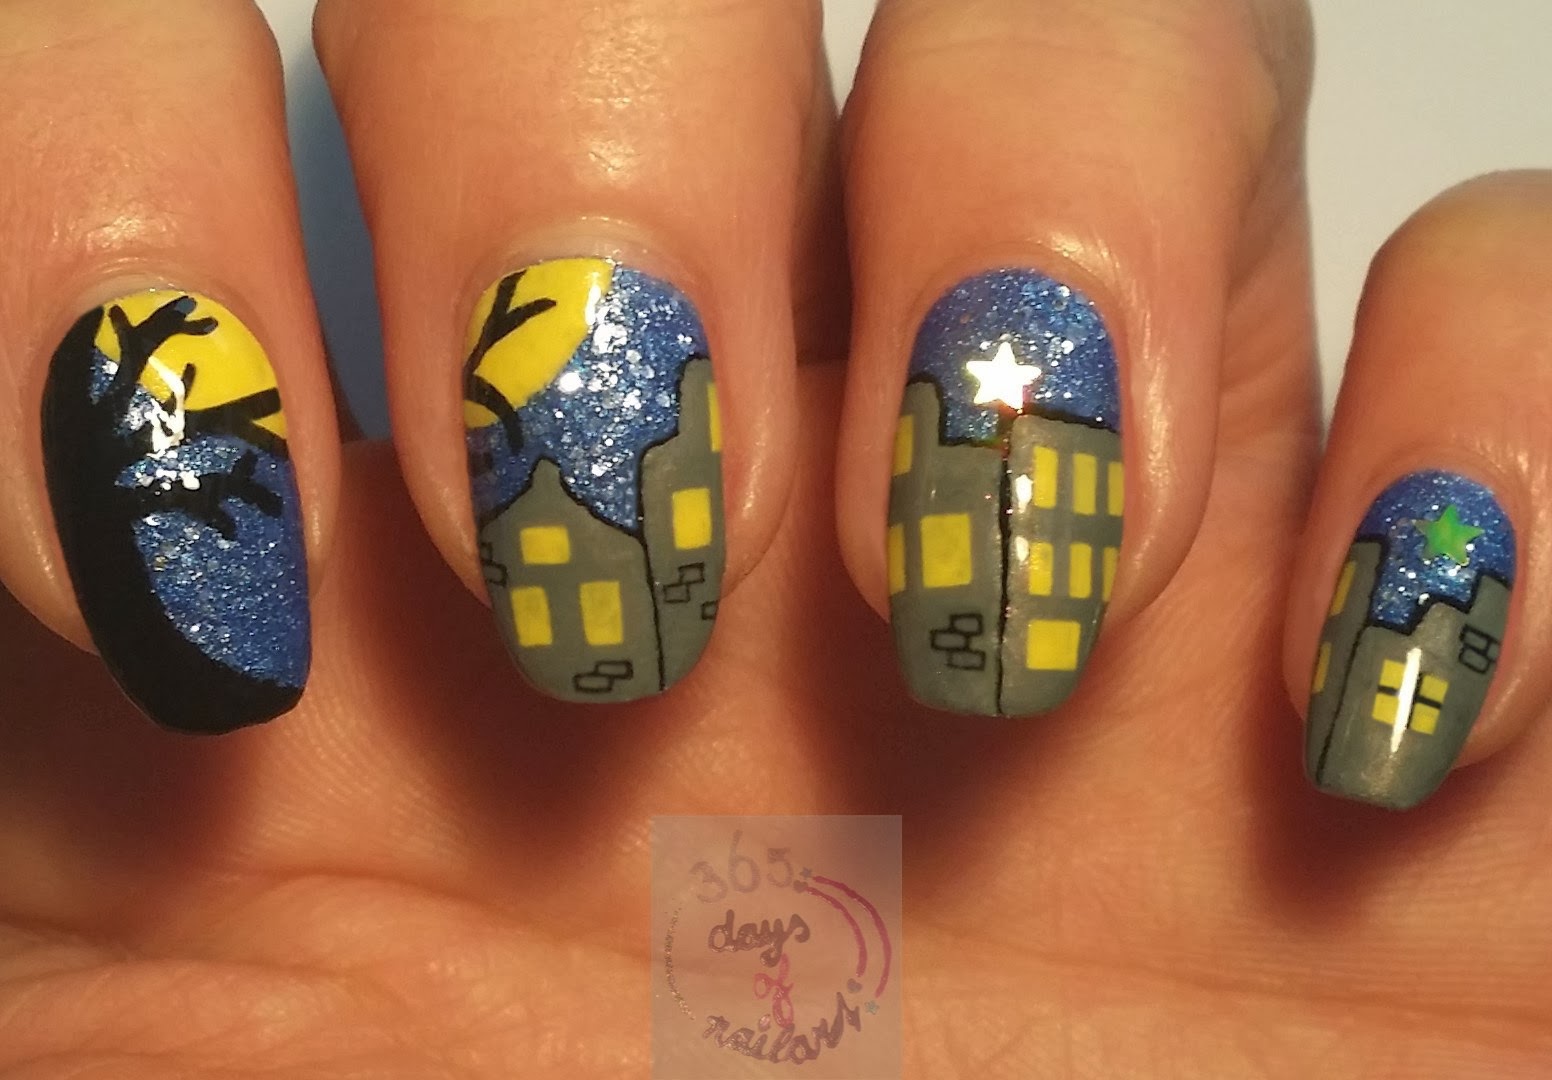
The difference in weather is as big as the difference between day and night. Which brought me to the theme of this nail art "Day & Night".
If got 5 different designs for you:

First design:


1. Start with painting the nail in black. When this is dry. Divide the nail diagonal in half with a light blue colour as shown on the first picture.
2. Take yellow and make a sun and moon.
3. Then detail the nail art with some white and black: eyes and mouth of sun and moon. Some white stars (small dots) on the 'night' side and some white clouds on the 'day' side.


Second design:


1. Start by painting the nail in a light blue colour.
2. Then paint a white circle on the nail.


3. Divide the circle in a kind of Yin and Yang by using a blue en yellow colour.
4. With the light blue you make the moon and some stars (small dots) on the 'night' side. With orange you make the sun on the 'day' side.

Third design:


1. Start by painting the nail blue. When this is dry make the lower half dark blue.
2. With yellow you make the sun on the upper half. I used light blue for the moon and stars.

Fourth design:


1. Paint the nail white. Use black to divide the nail as shown on the first picture.
2. The white half circle represents the moon. On the other side you create a half sun with yellow.

Fifth design:


1. Paint half of the nail white and half yellow.
2. Use black to make a circle and divide the circle as shown on the second picture.


3. Fill up the left side of the circle with the same yellow as the rest of the half nail.
4. Give the left side some sunbeams. You can do this by making the rest of this side blue (see picture)


5. Now dot the same for the other side (moonbeams) and make everything outside these beams and on that side dark blue.
6. Now give the sun some body by making an orange mouth and eyebrow and by giving it an open eye. Detail the sunbeams. N.B. The sun and moon are sharing the mouth and nose.


7. The last step is giving the moon some details; give the mouth a blue colour and make a closed eye (see picture).
The moonbeams get some more detail by using the dark blue colour.


These are my 5 designs for a day & night nail art.


  Hope you like them!